

How To Draw Ionic Solids + And -
Concluding calendar week I released a two part screencast where I built a unproblematic drawing application in Ionic live on screen. Since I'k but making things up as I continue in these style of videos, the end result ordinarily works merely is lacking in shine.
As such, I like to do a follow-up blog post where I spend some fourth dimension finishing upwards the application a chip then writing a more detailed tutorial on creating the application. In this tutorial, nosotros volition walk through building a simple drawing application in Ionic using an HTML5 sheet. Users will have the ability to depict with a variety of different brush sizes and colours, they will exist able to erase parts of the drawing, or delete the entire sail and start over again.
If you are unfamiliar with the <canvas> element, information technology basically provides an expanse on the screen that we can "draw" on through interacting with a Javascript API. By using methods like lineTo, stroke, and make full nosotros can create various lines and shapes in a variety of colours on the canvass.
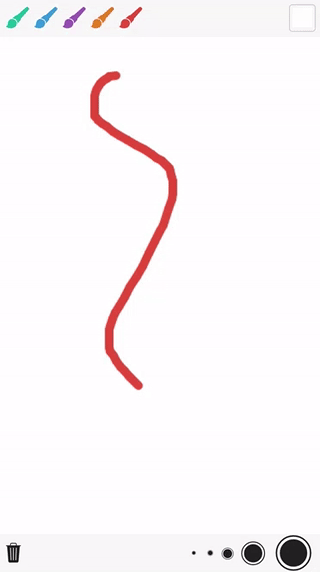
This is what information technology will await like when nosotros are finished:
Before We Become Started
Last updated for Ionic 3.1.0
Earlier you go through this tutorial, you should take at least a basic understanding of Ionic concepts. You must too already have Ionic ready on your machine.
If you're non familiar with Ionic already, I'd recommend reading my Ionic Beginners Guide or watching my beginners series beginning to get upward and running and empathise the basic concepts. If you want a much more detailed guide for learning Ionic, then take a expect at Building Mobile Apps with Ionic.
i. Generate a New Ionic Application
We're going to showtime by generating a new blank Ionic application, to do that simply run the following command:
ionic start ionic - drawing bare Once that has finished generating, yous should brand it your working directory by running the following command:
cd ionic-drawing We will be implementing the functionality for the sail through a component. Rather than difficult coding this into one of our pages, by creating a custom component that implements the functionality we would be able to easily driblet this sail in wherever we want. Permit's create the custom component for that now.
Run the post-obit command to generate the CanvasDraw component:
ionic k component CanvasDraw In order to be able to utilise this component throughout the application, we will also need to add information technology to our app.module.ts file.
Modify src/app/app.module.ts to reflect the following:
import { BrowserModule } from '@angular/platform-browser' ; import { ErrorHandler , NgModule } from '@angular/core' ; import { IonicApp , IonicErrorHandler , IonicModule } from 'ionic-angular' ; import { SplashScreen } from '@ionic-native/splash-screen' ; import { StatusBar } from '@ionic-native/condition-bar' ; import { MyApp } from './app.component' ; import { HomePage } from '../pages/dwelling/home' ; import { CanvasDraw } from '../components/sail-draw/canvas-draw' ; @ NgModule ({ declarations: [ MyApp , HomePage , CanvasDraw ], imports: [ BrowserModule , IonicModule . forRoot ( MyApp )], bootstrap: [ IonicApp ], entryComponents: [ MyApp , HomePage ], providers: [ StatusBar , SplashScreen , { provide: ErrorHandler , useClass: IonicErrorHandler }, ], }) export class AppModule {} ii. Create the Basic Cartoon Functionality
To start off with, we are just going add a basic implementation of the canvas. We volition add the canvass to our template, and set up some basic functionality that will handle drawing a simple line onto the canvas (wherever the user moves their finger).
Change src/components/sail-draw/sheet-draw.html to reflect the post-obit:
< ion-toolbar id = "superlative-toolbar" > </ ion-toolbar > < canvas #myCanvas (touchstart) = "handleStart($event)" (touchmove) = "handleMove($result)" ></ canvas > < ion-toolbar id = "bottom-toolbar" > </ ion-toolbar > In the code above, we have added the <canvas> chemical element to the template for the component, also has some toolbars that we will brand utilize of later. We add a template variable of #myCanvas so that we can easily go a reference to this element in a moment, and we also gear up upwards consequence bindings for touchstart and touchmove. These event bindings are what we will hook into to depict onto the canvass using the Javascript API.
So that the canvas displays correctly, we will also demand to add a few styles to the component.
Alter src/components/sail-describe/sheet-draw.scss to reflect the following:
canvas-describe { superlative : 100% ; width : 100% ; display : block ; #top-toolbar { position : absolute ; meridian : 0 ; } #bottom-toolbar { position : absolute ; bottom : 0 ; } } Now let's get into implementing the TypeScript file for the component, which will comprise near of the interesting stuff.
Modify src/components/canvas-draw/canvas-draw.ts to reverberate the post-obit:
import { Component , ViewChild , Renderer } from '@angular/core' ; import { Platform } from 'ionic-angular' ; @ Component ({ selector: 'canvass-draw' , templateUrl: 'canvas-describe.html' }) export class CanvasDraw { @ ViewChild ( 'myCanvas' ) canvas : whatever ; canvasElement : any ; lastX : number ; lastY : number ; currentColour : cord = '#1abc9c' ; brushSize : number = 10 ; constructor ( public platform : Platform , public renderer : Renderer ) { console . log ( 'How-do-you-do CanvasDraw Component' ); } ngAfterViewInit (){ this . canvasElement = this . canvas . nativeElement ; this . renderer . setElementAttribute ( this . canvasElement , 'width' , this . platform . width () + '' ); this . renderer . setElementAttribute ( this . canvasElement , 'height' , this . platform . height () + '' ); } handleStart ( ev ){ this . lastX = ev . touches [ 0 ]. pageX ; this . lastY = ev . touches [ 0 ]. pageY ; } handleMove ( ev ){ let ctx = this . canvasElement . getContext ( '2d' ); allow currentX = ev . touches [ 0 ]. pageX ; let currentY = ev . touches [ 0 ]. pageY ; ctx . beginPath (); ctx . lineJoin = "round" ; ctx . moveTo ( this . lastX , this . lastY ); ctx . lineTo ( currentX , currentY ); ctx . closePath (); ctx . strokeStyle = this . currentColour ; ctx . lineWidth = this . brushSize ; ctx . stroke (); this . lastX = currentX ; this . lastY = currentY ; } } This implements the bones functionality for our canvass and volition give the user the ability to draw a simple line. We've set a few member variables, so let'due south talk through those start:
@ ViewChild ( 'myCanvas' ) sheet: whatsoever ; canvasElement: any ; lastX: number ; lastY: number ; currentColour: cord = '#1abc9c' ; brushSize: number = x ; We take hold of a reference to the canvas element by using @ViewChild and supplying it with the template variable we added earlier. We take a canvasElement member that volition hold a reference to the actual DOM chemical element for the canvas, a lastX and lastY that will shop the coordinates of the users concluding bear on on the screen, and acurrentColourandbrushSize` for determining the size and colour of the brush strokes we volition be drawing on the canvass.
In the ngAfterViewInit office, we create a reference to the nativeElement for the canvas (which is the bodily DOM chemical element that we want to work with, not just the object that @ViewChild returns), and we set the width and summit of the canvas to equal whatever the current width and height of the device is.
The handleStart function handles recording where the user has tapped on the screen. This is important because in order to draw a line nosotros demand to know the ten and y coordinates of where we want to draw the line from and where we want to depict the line to.
The handleMove function is what handles drawing the line itself. We become the new x and y coordinates, and then we interact with the sheet by using its context. This allows united states to telephone call the various methods of the Sheet API. In our case, we define a path from the concluding coordinates to the new coordinates, and then we stroke that path (which basically means "draw a line over information technology") with the current brush colour and with a thickness of whatever the current castor size is. After that, we set up the terminal coordinates to exist the coordinates we only used so that adjacent time the function is triggered that will become the first of the path.
3. Add the Component to the Home Page
At this bespeak, although nosotros accept not finished implementing all the functionality of the component, it should be in working social club. So, we are going to add this component to our home page now and and so continue adding some functionality to it.
Modify src/pages/home/dwelling.html to relect the post-obit:
< ion-content no-bounce > < canvas-draw ></ canvas-draw > </ ion-content > If you were to burn up the application in your browser at present, you lot should be able to draw onto the canvas. Since we are listening specifically for touch events, you will have to make sure that you use the Chrome DevTools emulator to utilise the application or run it on a device (otherwise bear upon events volition not exist triggered).
iv. Add Castor Sizes and Colours
Now we are just going to make some slight modifications to permit the user to change the color and size of the brush, likewise every bit adding the ability to erase or delete their drawing.
Change src/components/canvas-draw/canvas-describe.html to reflect the following:
< ion-toolbar id = "top-toolbar" > < ion-buttons left > < button *ngFor = "let color of availableColours" icon-only ion-button (click) = "changeColour(colour)" > < ion-icon [style.color] = "colour" proper noun = "brush" ></ ion-icon > </ push > </ ion-buttons > < ion-buttons correct > < push manner = "border: 1px solid #cecece;" ion-push icon-only fashion.colour = "#fff" (click) = "changeColour('#fff')" > < ion-icon style = "color: #fff;" name = "square" ></ ion-icon > </ button > </ ion-buttons > </ ion-toolbar > < canvas #myCanvas (touchstart) = "handleStart($upshot)" (touchmove) = "handleMove($event)" ></ canvas > < ion-toolbar id = "bottom-toolbar" > < ion-buttons left > < button color = "dark" ion-button icon-only (click) = "clearCanvas()" > < ion-icon proper noun = "trash" ></ ion-icon > </ button > </ ion-buttons > < ion-buttons right > < button color = "dark" ion-push icon-only (click) = "changeSize(5)" > < ion-icon style = "font-size: 0.25em;" proper noun = "radio-button-on" ></ ion-icon > </ push button > < push button color = "night" ion-push icon-only (click) = "changeSize(x)" > < ion-icon mode = "font-size: 0.5em;" name = "radio-push button-on" ></ ion-icon > </ push > < button color = "dark" ion-button icon-only (click) = "changeSize(20)" > < ion-icon fashion = "font-size: 1em;" name = "radio-button-on" ></ ion-icon > </ button > < button color = "night" ion-push button icon-simply (click) = "changeSize(fifty)" > < ion-icon style = "font-size: 2em;" proper noun = "radio-button-on" ></ ion-icon > </ button > < button color = "night" ion-button icon-only (click) = "changeSize(200)" > < ion-icon fashion = "font-size: 3em;" proper name = "radio-push-on" ></ ion-icon > </ push button > </ ion-buttons > </ ion-toolbar > We have added some buttons to the toolbars now. In the pinnacle toolbar we loop over an array of availableColours, which we volition create presently, and we create a button for each of those colours. These buttons will trigger a changeColour function and so that color will be passed into the function.
Nosotros take a similar arroyo with the erase button that is too in the top toolbar, except this one will sit off by itself and then we just define it manually and pass in #fff to the role ourselves.
We have taken a like arroyo for the bottom toolbar, except these buttons call a different function called changeSize. This will, of form, allow usa to change the size of the brush.
Let's implement these functions at present.
Alter src/components/sail-depict/canvas-depict.ts to reverberate the following:
import { Component , ViewChild , Renderer } from '@angular/core' ; import { Platform } from 'ionic-angular' ; @ Component ({ selector: 'canvas-describe' , templateUrl: 'canvass-draw.html' }) export class CanvasDraw { @ ViewChild ( 'myCanvas' ) canvas : whatsoever ; canvasElement : whatever ; lastX : number ; lastY : number ; currentColour : string = '#1abc9c' ; availableColours : any ; brushSize : number = 10 ; constructor ( public platform : Platform , public renderer : Renderer ) { panel . log ( 'Hello CanvasDraw Component' ); this . availableColours = [ '#1abc9c' , '#3498db' , '#9b59b6' , '#e67e22' , '#e74c3c' ]; } ngAfterViewInit (){ this . canvasElement = this . sheet . nativeElement ; this . renderer . setElementAttribute ( this . canvasElement , 'width' , this . platform . width () + '' ); this . renderer . setElementAttribute ( this . canvasElement , 'elevation' , this . platform . height () + '' ); } changeColour ( color ){ this . currentColour = colour ; } changeSize ( size ){ this . brushSize = size ; } handleStart ( ev ){ this . lastX = ev . touches [ 0 ]. pageX ; this . lastY = ev . touches [ 0 ]. pageY ; } handleMove ( ev ){ let ctx = this . canvasElement . getContext ( 'second' ); let currentX = ev . touches [ 0 ]. pageX ; permit currentY = ev . touches [ 0 ]. pageY ; ctx . beginPath (); ctx . lineJoin = "round" ; ctx . moveTo ( this . lastX , this . lastY ); ctx . lineTo ( currentX , currentY ); ctx . closePath (); ctx . strokeStyle = this . currentColour ; ctx . lineWidth = this . brushSize ; ctx . stroke (); this . lastX = currentX ; this . lastY = currentY ; } clearCanvas (){ allow ctx = this . canvasElement . getContext ( '2d' ); ctx . clearRect ( 0 , 0 , this . canvasElement . width , this . canvasElement . height ); } } We've added our array of availableColours now, you could extend this to include as many colours as you lot would like. We have besides divers the additional functions for changing the brushSize and currentColour as well as a part that will clear the unabridged canvas.
If yous load up the application at present, you should see the finished product:
Summary
This is a very basic introduction to the powers of the <canvas> element, but hopefully, it should highlight how you lot might go well-nigh integrating the canvas into an Ionic awarding.

Source: https://www.joshmorony.com/creating-a-drawing-application-in-ionic/
Posted by: wittethareck.blogspot.com
0 Response to "How To Draw Ionic Solids + And -"
Post a Comment